


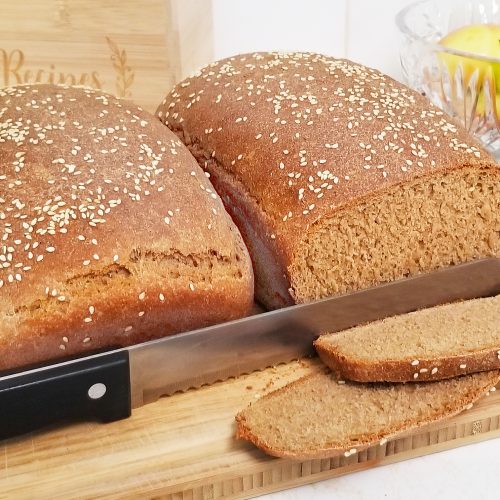
Whole Wheat Bread Recipe [Simple & Fluffy]

Make your own delicious fluffy healthy bread from scratch with 5 simple ingredients in this whole wheat bread recipe. Once you learn to make this homemade, you can make any type you want. Use this recipe as a base sponge and turn it into your favorite flavor. Keep you and your family free of unnatural and unhealthy ingredients found in common store-bought bread, and at a fraction of the cost. No fancy expensive equipment is needed like a mixer or bread machine. 100% credit for this recipe to Walter Veith.
Please let us know how this recipe turns out for you in the comments below! Your feedback is important.
If you love this recipe, you’ll also enjoy my other bread recipes and these whole food plant-based recipes!
Is wheat bread healthy?
Yes, absolutely, almost all scientific studies and published health advice agree [1]! To be clear, only whole wheat bread made from stone-ground 100% whole wheat flour, meaning it will not contain any enriched wheat flour. Make sure the wheat flour bag says 100% whole and stone ground! As how it is processed can greatly affect how your body will digest and absorb it [2].
100% whole wheat flour that is stone ground will contain ALL and ONLY the natural full wheat grain (bran, wheat germ, and endosperm) ground and milled up the old-fashioned way with big stones. Stoneground 100% whole wheat flour should not be refined, bleached, chemically treated, synthetically enriched, or stripped of part of the grain, fiber/protein (the bran), or oils/nutrients in the grain (the germ).
100% whole wheat flour that is not stone ground, is milled using crushing rollers that separate the bran, germ, and endosperm, then at the end of the processing, the manufacturers recombine into the crushed endosperm some but not all of the natural bran and germ back together, leaving you with an unnatural flour mixture.
This can result in less fiber and nutrient levels in the “whole flour”. How can stores and manufacturers get away with this seemingly deceptive product? The FDA says food to be considered whole grain must contain at least 51 percent of the whole grains by weight [3]. The end product is lots of refined chemically treated starch from just the endosperm, with not enough bran fiber, protein, or germ oil and nutrients. Our bodies will digest and absorb the sugars more rapidly causing blood sugar spikes, it could increase the risk of diseases related to insulin resistance, like diabetes and heart disease [2]. The bran missing is a key component that slows this process down and provided digestive regulation.
This is why we recommend stone-ground and as little processing as possible. What was created by God in nature is healthy and already as is to be used for food. No extra refining or treating is needed.
If you can afford it and find it, we also recommend non-GMO and organic. Why? Yet again then you know your flour is natural, with no pesticides or chemicals, and has not been genetically modified. Bob’s Red Mill sells organic 100% stone-ground near us.
Good Complex Carbohydrates
You might have heard of these low carbohydrate diets; Keto, Low-Carb Paleo, Atkins, and more… which are based on the theory that carbohydrates are bad for you, so you should avoid starchy food, including bread. In fact, many people with type 2 diabetes are put on a low-carb diet by their doctors.
I was one of them when I was pregnant with my 2 kids and diagnosed with gestational diabetes. Even in between my first and second kid, I struggled with hypoglycemia and was told to monitor and severely limit my carbs. My doctors and dietitians both recommended carb counting and pairing eating protein with everything. So I had to limit all of my carbs, and couldn’t even have a sandwich with 2 slices of bread. Frustratingly restrictive, but that is how extreme some diets get!
What I learned three years later after my own research and reading were, that there are good carbs and bad carbs. Complex carbohydrates and simple ones. Which my doctors and dietitians didn’t distinguish between…
Good carbs are complex carbohydrates from whole grains, rye, whole-wheat flour, brown rice, oatmeal, and whole cornmeal, etc. Whereas bad carbs are simple carbohydrates from refined and processed grains like white rice, and baked goods made with white flour. [X] The difference is in the molecule’s structure of the sugars they are made up of, and the longer molecules (complex) ones take longer for your body to break down. This means that glucose is released not immediately and at a more steady rate, instead of in a spike and drop. [X]
So whole wheat bread is a more complex carbohydrate and healthier for you. The best complex bread you can eat is actually whole sprouted grain bread, like Food for Life’s Ezekiel bread (based on the bread recipe in the Bible Ezekiel 4:9). [X]
Now also, remember I said I had to pair carb counting with eating protein with everything. I was told this was to help maintain steady glucose levels. So I’m eating lots of protein. Your body can only use so much protein and it can’t store protein like glucose. Your body can’t turn protein into glucose either.
Well, what my doctors and dietitians failed to consider is FIBER. Fiber will bind and also help keep glucose levels steady. Fiber also does many other great things for your digestive tract.
So whole wheat bread is a better option than white bread because it provides a higher amount of fiber and protein, both of which slow the absorption of sugar in your bloodstream to keep blood sugar steady.
The milling process mechanically removes the bran, which is the fiber-rich outer layer of the grain and contains B vitamins and other minerals. Milling also removes the second germ layer, which is rich in Vitamin E and essential fatty acids. In the end, what’s left is the starchy center, which is ground into white flour for various baking purposes. Refined wheat flour lacks all of those wonderful nutrients and high-starch foods like white bread can quickly raise your blood sugar levels, putting you at risk for diseases like diabetes.
A Protein Source
It’s the question that vegans and whole-food, plant-based eaters hear all the time: “Where do you get your protein?” Given the abundance of misinformation on the subject, concern over protein deficiency is understandable—but totally unfounded in science. Without even trying, you are most likely getting more protein than you need—whether you’re a vegan, vegetarian, or omnivore.
We’ve established that vegans get more than enough protein, but do meat and dairy somehow offer qualitatively “better” protein than plant sources? Not by a long shot. It might seem wise to err on the side of getting too much protein. But doing so poses health risks, particularly if you’re consuming animal protein: A growing body of research demonstrates a link between animal protein intake and serious health problems, including cancer, heart disease, and osteoporosis. Your body breaks down the amino acids in foods and builds them up into complete proteins all on its own.
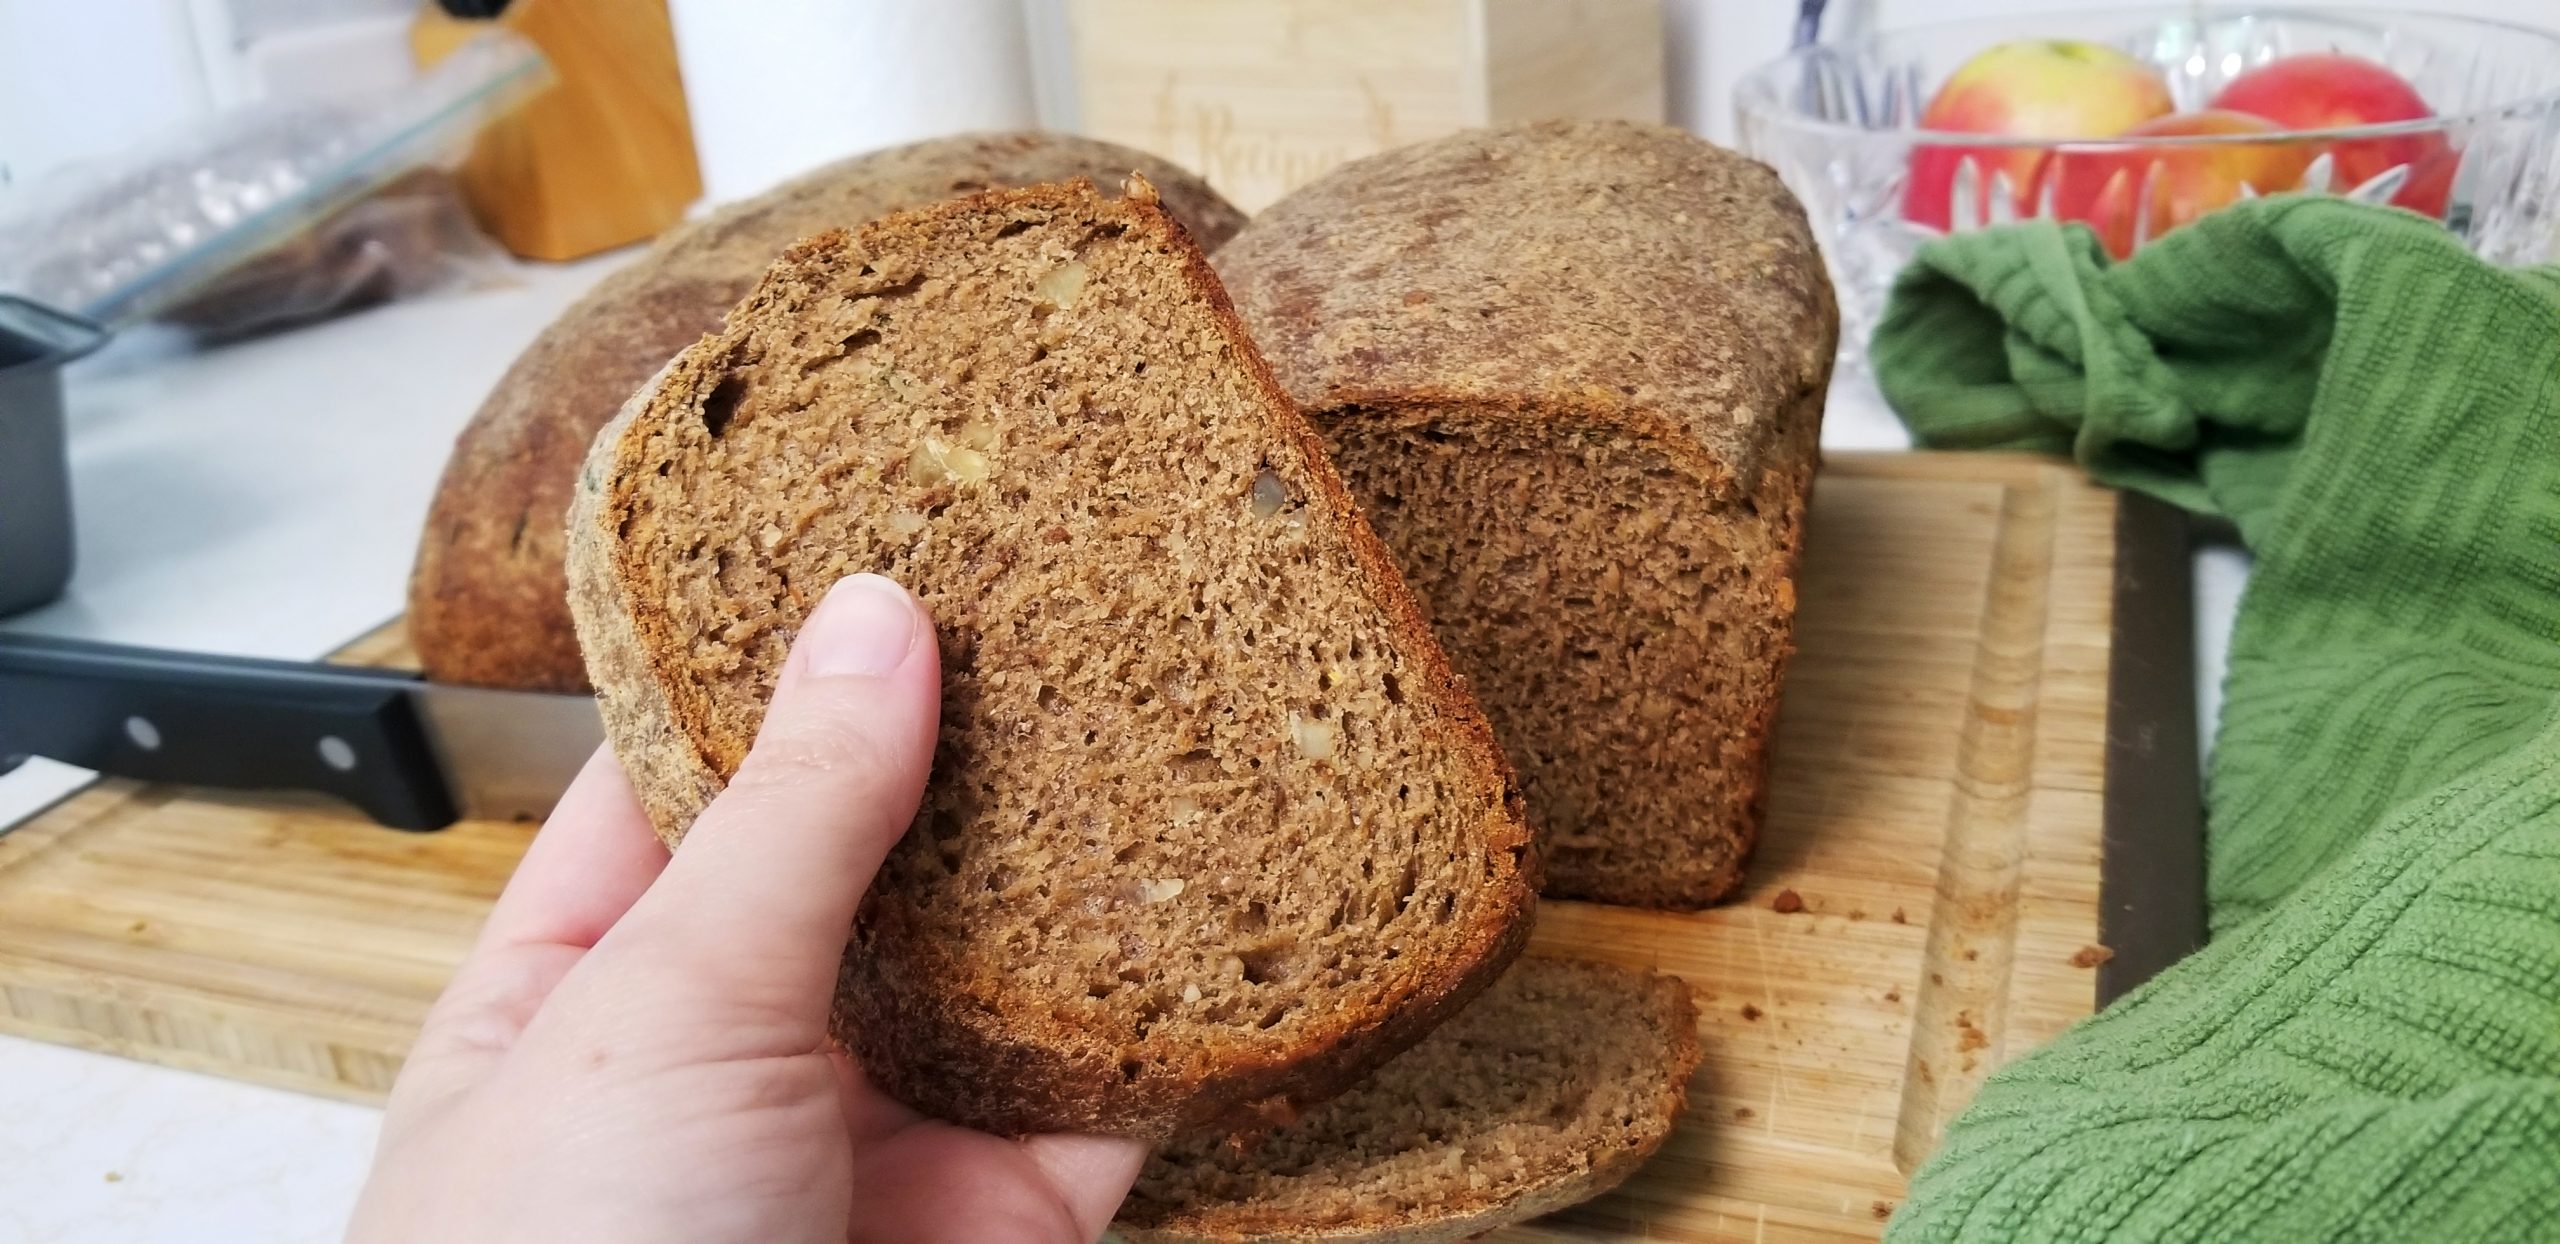
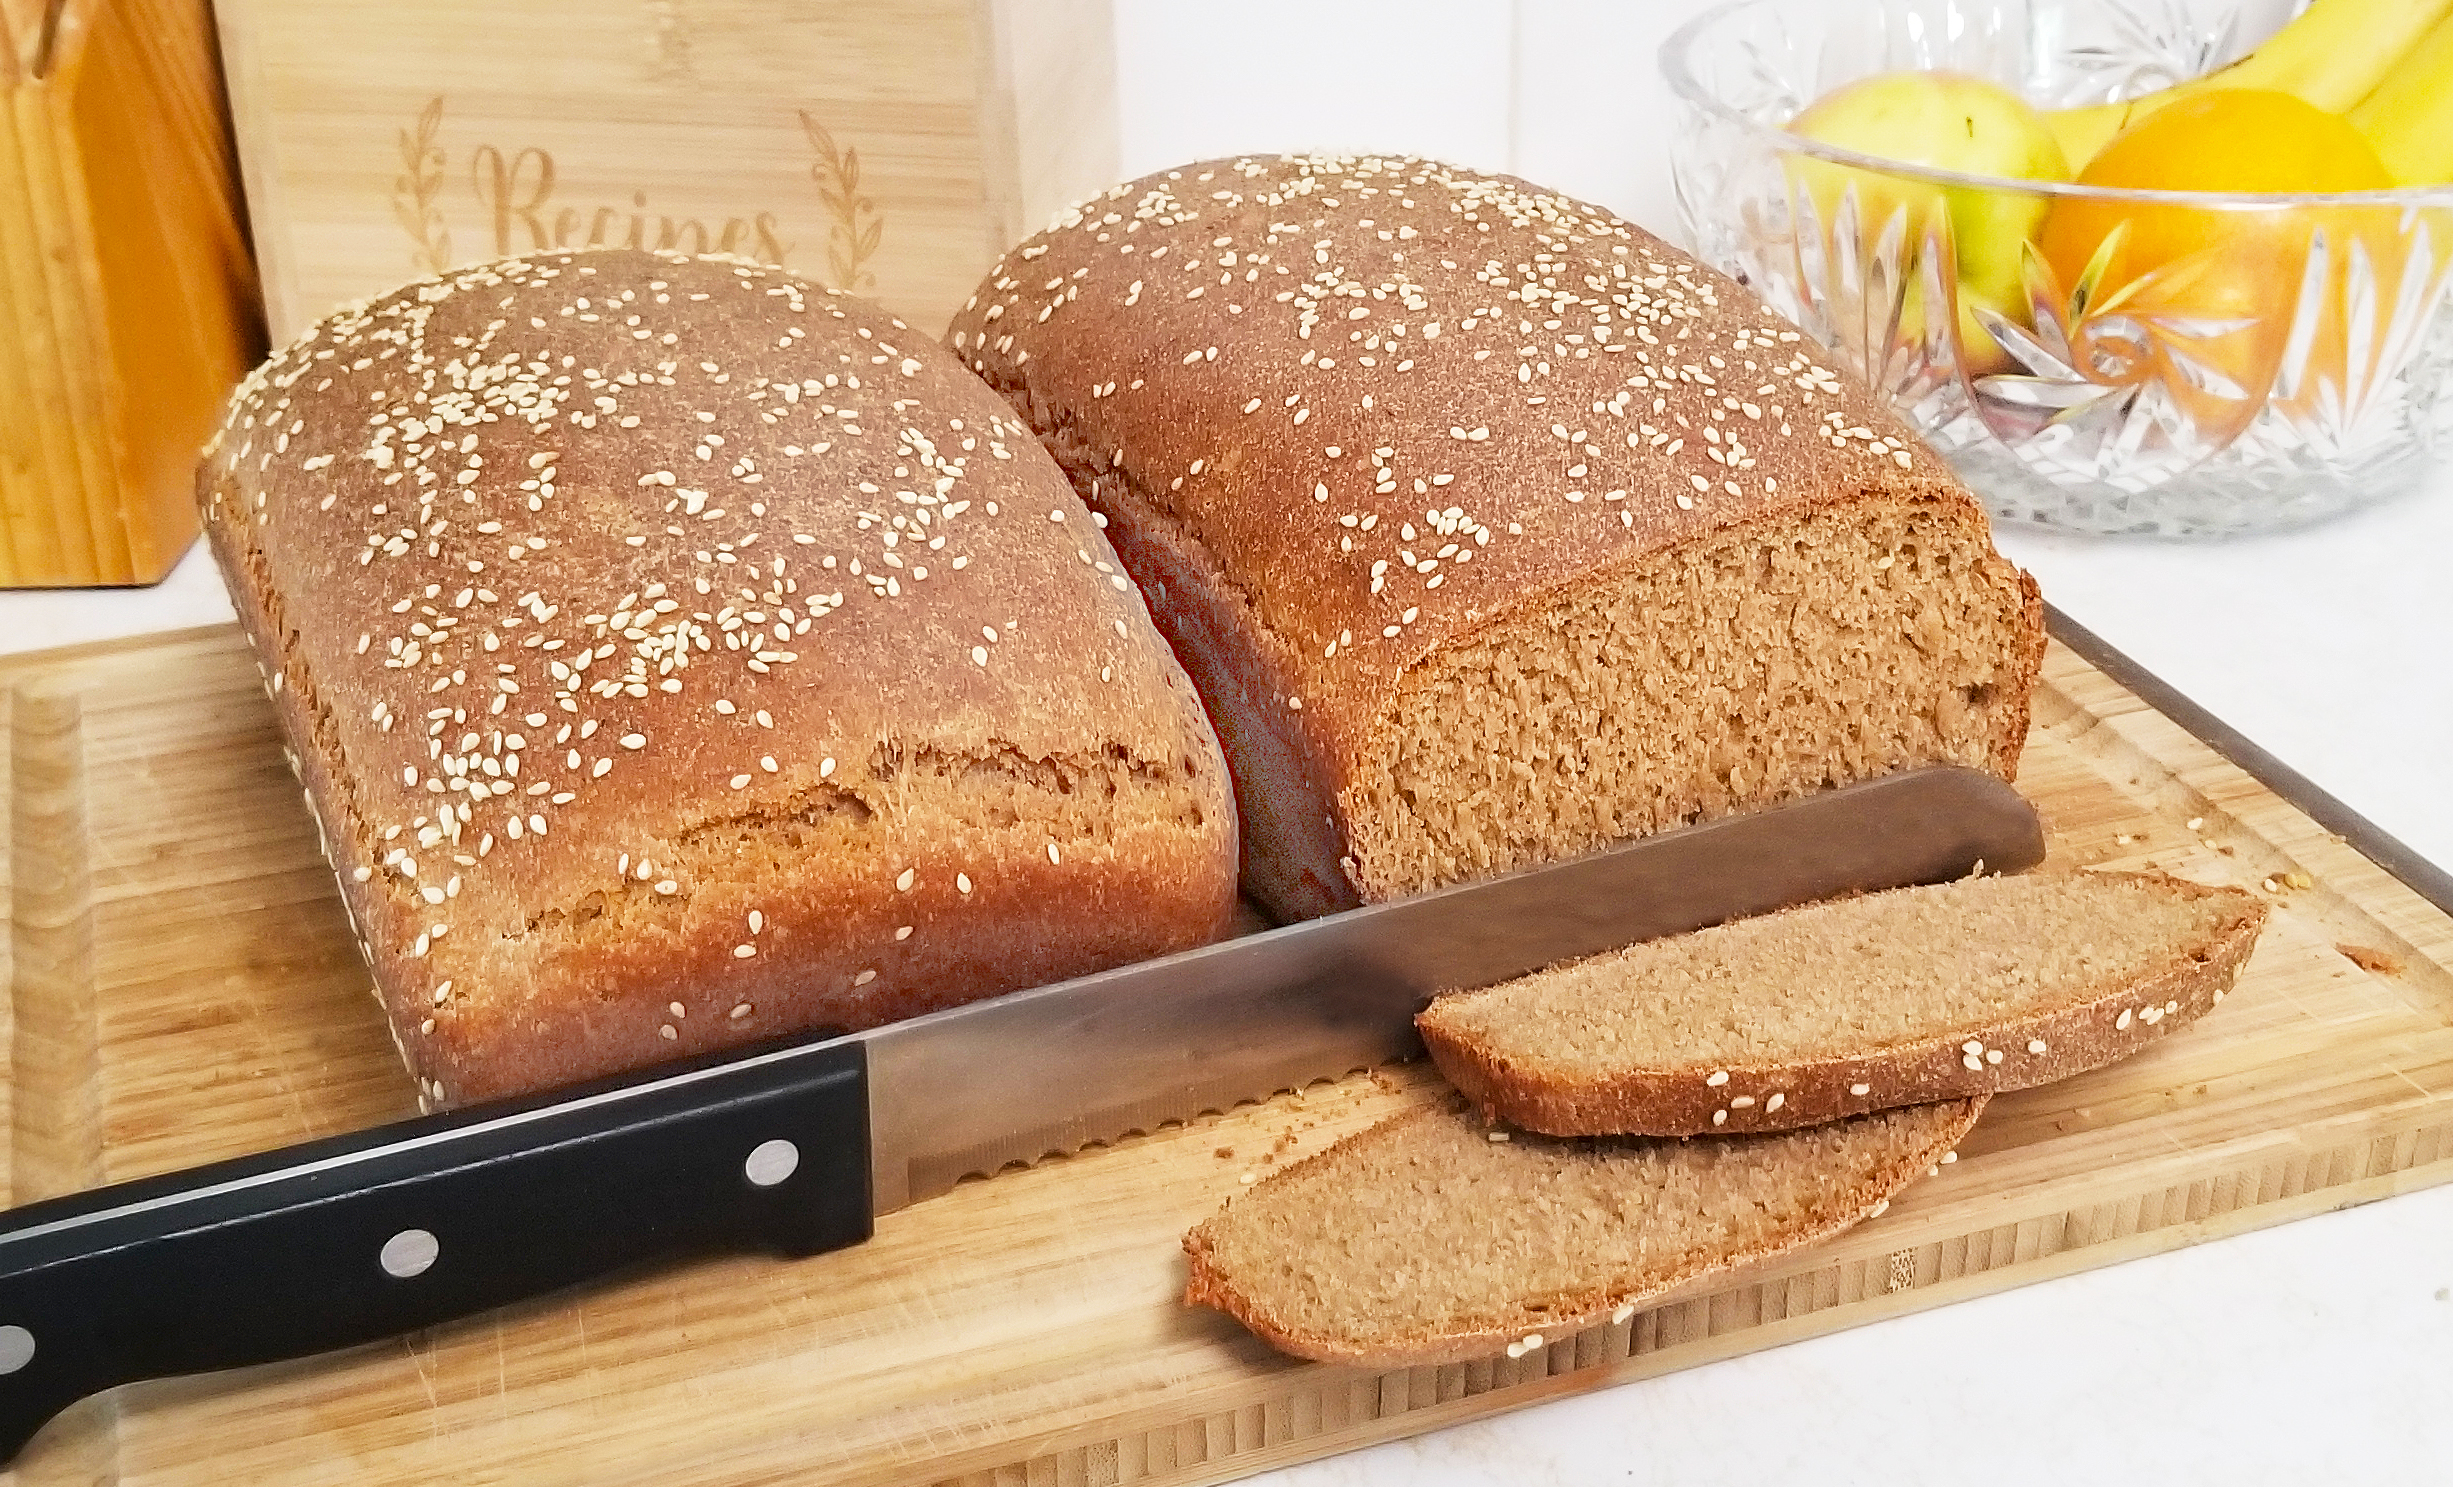
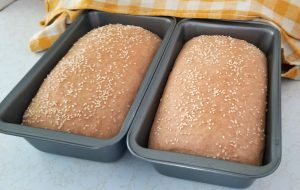
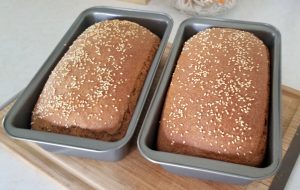
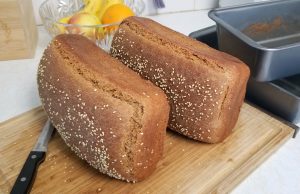
Recipe Photo Gallery


How to Store Homemade Whole Wheat Bread
After all your work to make your whole wheat bread, you want to make sure to store it properly. We recommend storing it in a healthy way that will make it last as long as possible. If you plan to eat it the same day for a great feast with friends, then there is no need to store it. Just enjoy!
We store our whole wheat bread in flexible stretch zip-top bags or plastic wrap. The stretch zip-top bags are 1-gallon size and fit one loaf perfectly. You can easily just wrap the loaf in plastic wrap.
If you prefer a more natural and sustainable way to store it, then these are some good options:
- A wood or bamboo box
- A fabric linen or cotton bag
- A beeswaxed cotton cloth
How Long Does It Store
Homemade whole wheat bread does not store as long as commercially made store-bought. The main reason is that it does not include any preservatives. Most store-bought whole wheat bread contains a preservative like calcium propionate, or another propionate, to extend the shelf life by inhibiting the growth of spoilage microorganisms, namely mold and ropy bacteria. Some countries label the preservative by a number code E280-E283. Sometimes sorbic or benzoic acids are used as preservatives instead (E202 and E210, respectively).
The greatest bonus to making your own homemade bread is that it will not contain any processed, harmful preservatives or other cancer or inflammatory causing chemicals or chemically treated ingredients. The only thing in it is yummy healthy whole food from plants!
To make it last longer you can:
- Make sure it dries out well before storing
- Keep it tightly sealed
- Store it in the freezer until you are ready to use it
- Leave it in the fridge as you use it OR avoid storing it in damp, airy locations (which can speed up molding)
- Eat it before it goes bad (usually 4-5 days it will stay fresh)
- Cut slices from the middle, then store your bread with the end crusts intact on both ends “sealing” it
Meal Ideas
There are endless things you can do with your soft fluffy whole wheat bread! Here are just a few of some of my family’s favorite uses and combinations for our wheat bread.
Breakfast Ideas:
- French Toast with Fresh Mixed Berries
- Breakfast Sandwiches
- Black bean patties
- Tofu Scramble
- Spinach & tomatoes
- Cashew “cheese” spread
- Topped Healthy Toast
- Avocado & Tofu Scramble Toast
- Peanut Butter Banana or Apple Toast
- Strawberry Almond Yogurt Toast
- Cucumber Hummus Toast
Lunch Ideas:
Obviously TONS of sandwich bread ideas you can do, but here are some of our best we can’t get enough of.
- Grilled cashew “cheese” sandwiches with tomato soup
- Cold chickpea salad sandwiches
- Toasted sloppy Joe lentil sandwiches
- Baked croutons for any salad
Dinner Ideas:
- Garlic breadsticks with lasagna, pasta, or spaghetti
- Baked cashew “cheesy” bread with steamed veggies and baked potatoes
Snack Ideas:
- Toasted dipping bread with your favorite blend of hummus
- Classic peanut butter and jelly sandwich =)
Vegan Substitutions
If you prefer vegan over whole food plant-based, then don’t worry! You will only need to substitute one ingredient in this whole wheat bread recipe. You don’t have to use honey. Many vegans do not use honey because its commercial production exploits and harms the health of bee colonies.
All yeast bread needs a sweetener to feed the yeast fermentation process, which produced carbon dioxide, or called the leavening process. You can easily use any sweetener you prefer. We used 1 table of molasses, which gives the whole wheat bread a nice rich brown color. Or you can substitute with any other whole-food plant-based sweetener like pure agave nectar, pure maple syrup, date sugar, or pure brown rice syrup. So you would use and equip amount to substitute of 1 tablespoon of agave nectar, pure maple syrup, date sugar, or pure brown rice syrup. Depending on a bread recipe, sometimes you can use unsweetened applesauce or 100% pure fruit juice interchanged equally in bread dough.
Remember the limited amount of sweetener in the dough mix is only for the yeast fermentation process, and it will not be actually “sweetening” your final bread. It will be naturally sweet all on its own. If you are creating a sweet breakfast bread like banana nut or cranberry orange, then you would add additional whole food plant-based sweeteners on top of the sweetener that the yeast needs.
Sources:
[1] The Whole Truth About Whole Grains 11 reasons to make the switch now, Elaine Magee, MPH, RD, WebMD https://www.webmd.com/food-recipes/features/the-whole-truth-about-whole-grains
[2] Whole-Grain Foods Not Always Healthful, Melinda Wenner Moyer, Scientific American https://www.scientificamerican.com/article/whole-grain-foods-not-always-healthful/
[3] Health Claim Notification for Whole Grain Foods, FDA U.S. Food & Drug Administration https://www.fda.gov/food/food-labeling-nutrition/health-claim-notification-whole-grain-foods
Whole Wheat Bread Simple & Fluffy
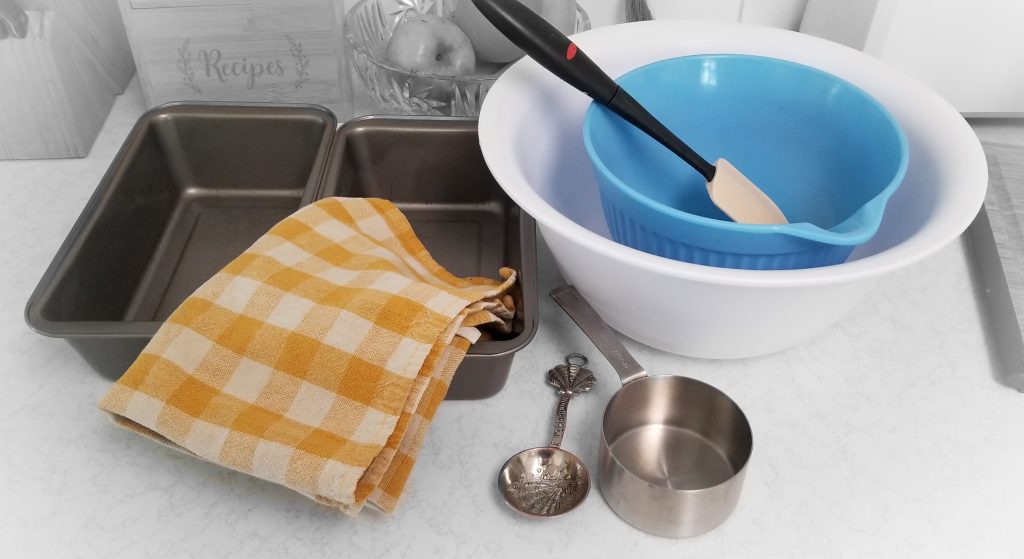
Equipment
- Large Size Plastic Bowl (Approx. 6 Qt)
- Medium Size Bowl
- Cup Measure
- Tablespoon Measure
- 2 Metal Non-stick Bread Pans (Approx. 9.5 x 5 Inch)
- Kitchen Hand Towel
- Spatula
- Oven
- Oven Mitt
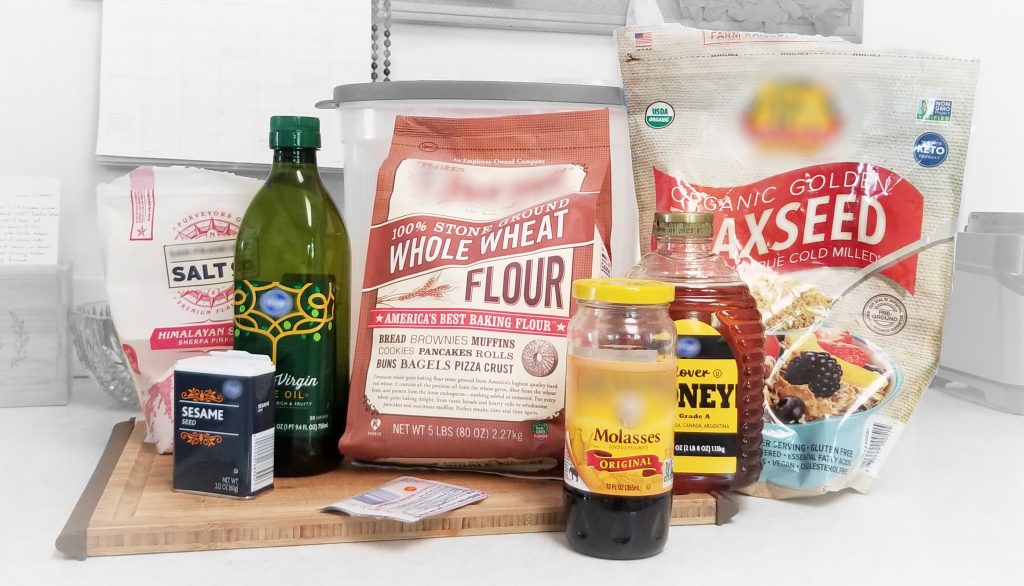
Ingredients
Dry Ingredients
- 7 Cups 100% Whole Wheat Flour Stone Ground, Unbleached, Unbromated & Recommend Non-GMO Organic if Possible
- 4 Tbsp Ground Flax Seed Optional. Recommend Non-GMO Organic if Possible
- 1 Tbsp Himalayan Pink Salt Or Sea Salt. Recommend not Iodized Salt or Highly Processed Salt
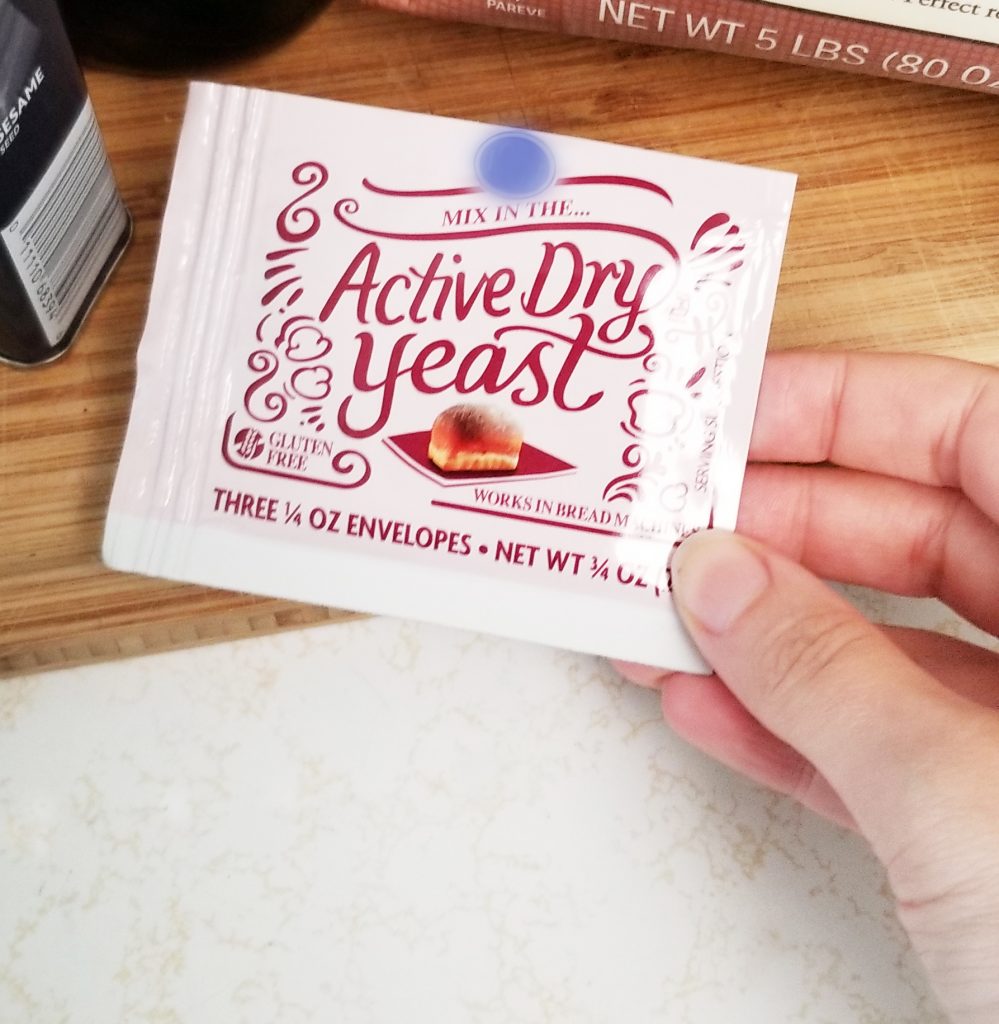
- 7 Grams Dry Active Yeast 1 Packet (1/4 Ounce) of Dry Active Yeast. Fast Rise Yeast Packets work as well.
Wet Ingredients
- 4 Cups Warm Water
- 1 Tbsp Molasses Or can substitute with honey, agave nectar, maple syrup, brown rice syrup, or any other natural whole food sweetener you prefer.
Finishing Ingredients
- 4 Cups Warm Water
- 1 Tbsp Olive Oil Extra Virgin Cold-Pressed, Bottled or Spray
- 1 Tsp Sesame Seed Optional
Instructions
Mixing
- Combine all dry ingredients (7 cups of 100% whole wheat flour, 1 tablespoon of Himalayan pink salt, 1 packet of active dry yeast) into a large size plastic bowl and stir ingredients together with a spatula. Optional to add 4 tablespoons of ground flaxseed for texture and extra nutrition.
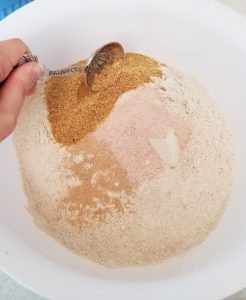
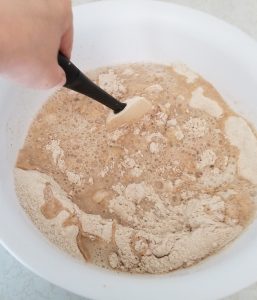
- Combine all wet ingredients into a medium-size bowl, mixing in the 1 tablespoon of molasses (or your preferred sweetener) all the way dissolved into 4 cups of warm water.

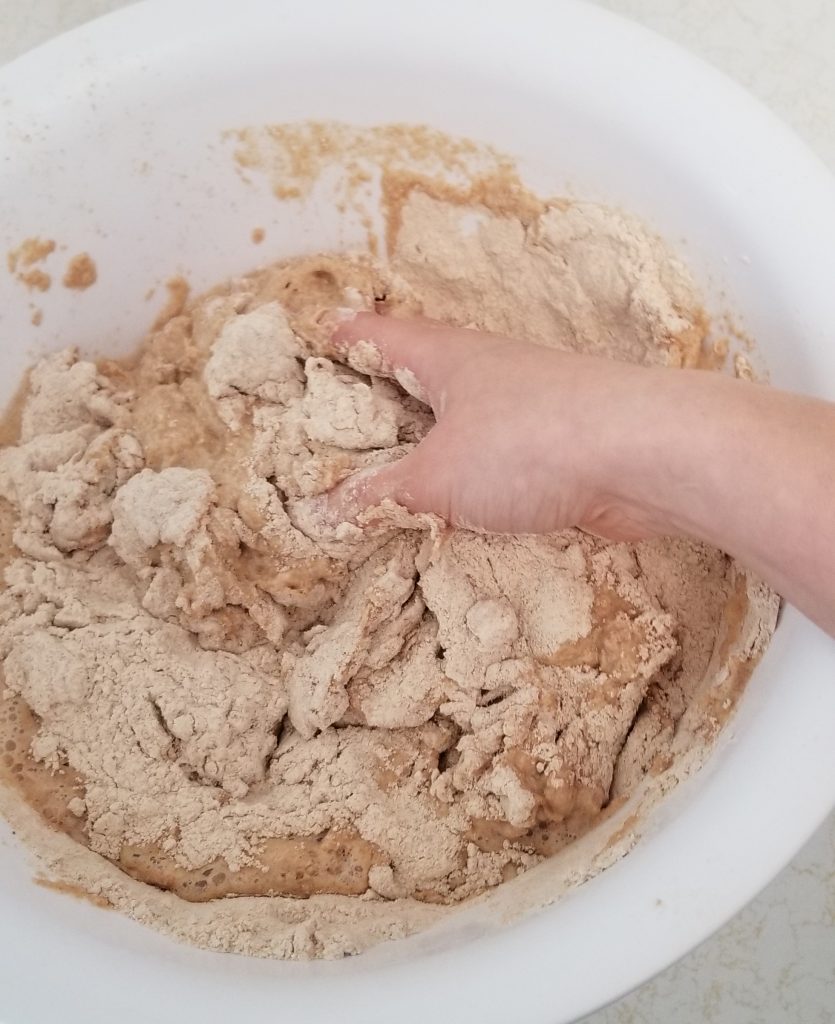
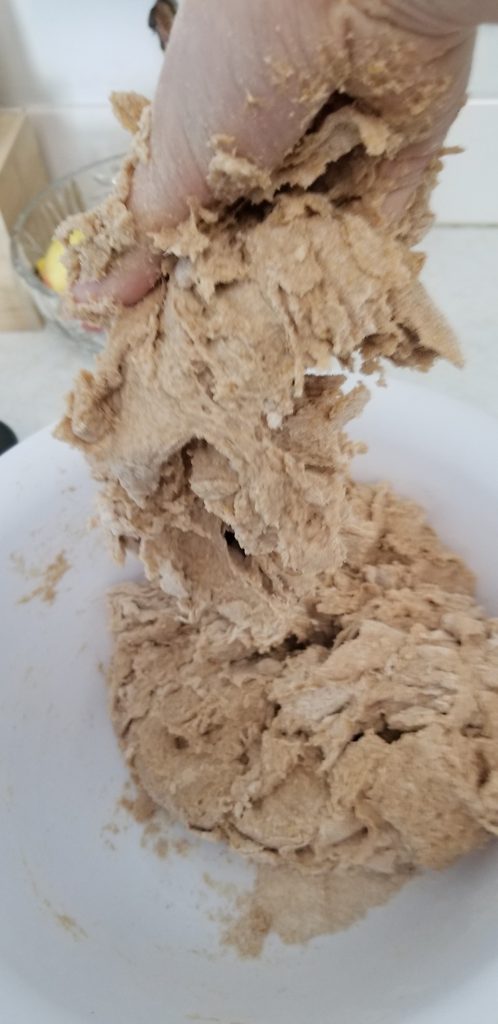
- Slowly add most of the liquid to the dry ingredients in the large bowl. Keep a cup to half a cup of liquid left, to add as needed for the correct dough consistency (not too firm or dry, and not runny). Mix with a spatula. As the mixture starts to clump and stick to the spatula, switch to using your hand to mix. Add the rest of the water as needed.
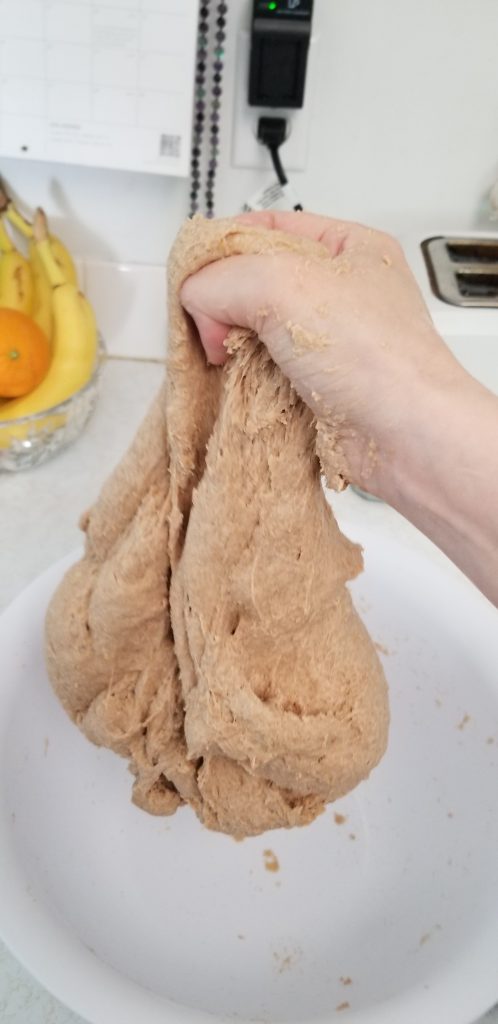
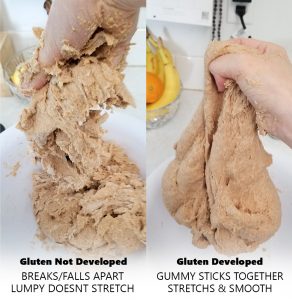
- Knead the mix for 4 to 6 minutes. Slow or weaker kneaders may have to knead longer.If you prefer to not hand knead, you can use a mixer machine.
Rising
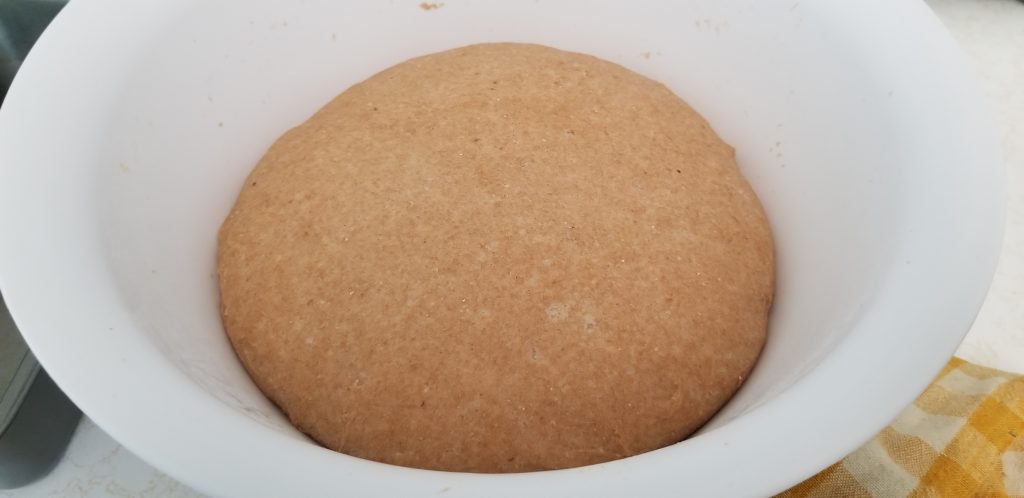
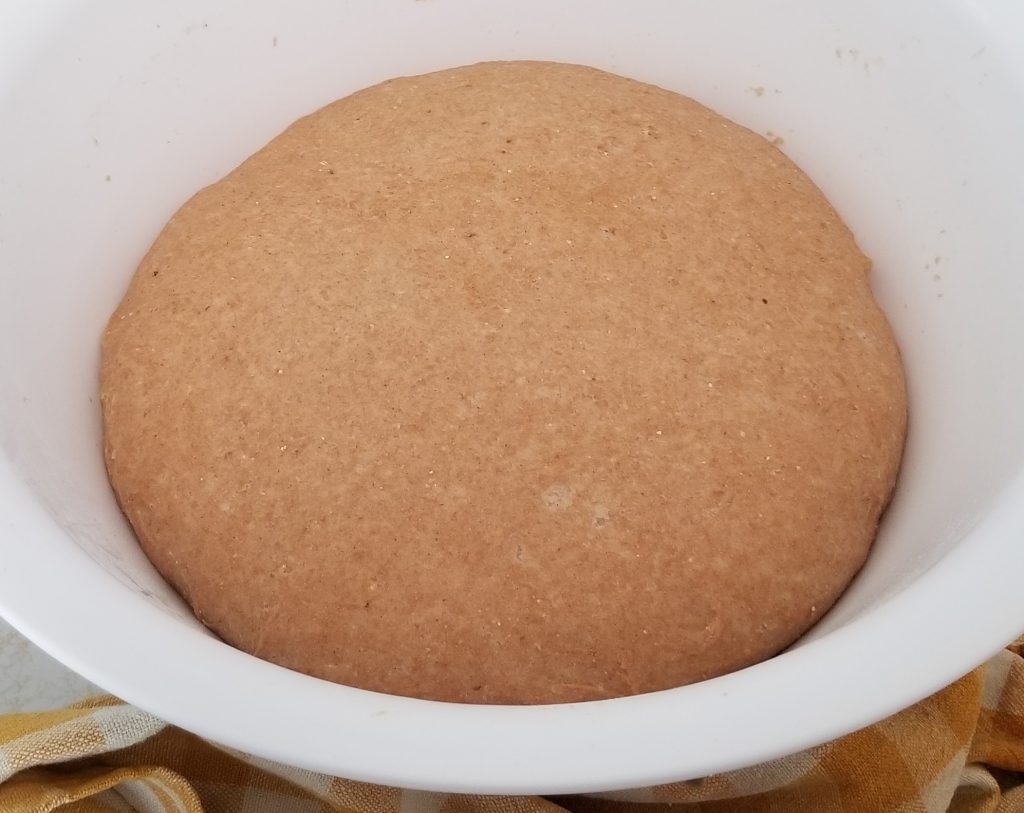
- Make your dough into a nice round ball in the middle of the large bowl. Cover the large bowl with a kitchen hand towel and set it somewhere it will not be bumped or disturbed as it rises. Let it rise this first time for 30 minutes. Your dough should rise at least double in size.
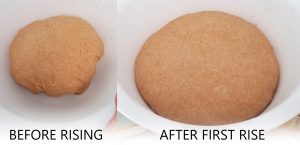
- Uncover your dough. Make sure it has at least doubled in size, otherwise let it rise for another 15 minutes.Fill a bowl with warm water. Dip your hand in the water to keep the dough from sticking to your hand as you punch it down.Casually punch and knead down the dough for 1 minute. No need for vigorous punching this time.

- Grease your 2 pans with olive oil (spread it around with a paper towel or use spray olive oil).
- Still dipping your hand as needed in the water to keep the dough from sticking, pinch the dough evenly in half. Smooth the 2 dough parts into two fat logs. Put 1 in each pan.

- Push and smush the dough down into the pan with your hand flat, filling the whole length of the pan and all 4 corners. Shape the dough with a nice curved top in the middle.
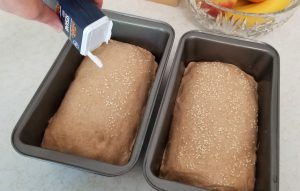
- Optionally you can top your bread with sesame seeds sprinkled on top, or another seed of your liking.
- Cover the bread pans with a kitchen hand towel and set it somewhere it will not be bumped or disturbed as it rises again. Let it rise the second time for 50 minutes. Your dough should rise at least double in size again.
Baking
- Preheat your oven to 500 degrees Fahrenheit.Optional or you can start by preheating your oven to 520, and let the bread cook for 5 minutes at that temperature before lowering it to 500. This will make it more crusty.
- Carefully put the pans into the oven. Bumping the pans or slamming the oven door could cause the dough to fall.Set a timer for 50 minutes to cook.
- Take your bread out of the oven and leave the loafs in the pans for 5-10 minutes to sweat.
- Loosen the bread by running a knife along the outside edges. Turn the pan upside down and shake your loaf out. Take your 2 loaves, turn them on their side, and cover them with the kitchen hand towel. Let them dry out and cool.
I saw Walter’s recipe and looks great but the kneading puts me off…I don’t do well with sticky messes lol.
Is Walter SDA?
Yeah I hear you, it does get sticky during the kneading. Yes, he is SDA.